|
A lot of my creativity is researched based. Most of these ideas came from Pinterest or else I have already posted about it. Here's how it looked when it all came together. I have added links to everything I could for easy access for you my party planner! It was well received and all the Disney fans really enjoyed themselves!
0 Comments
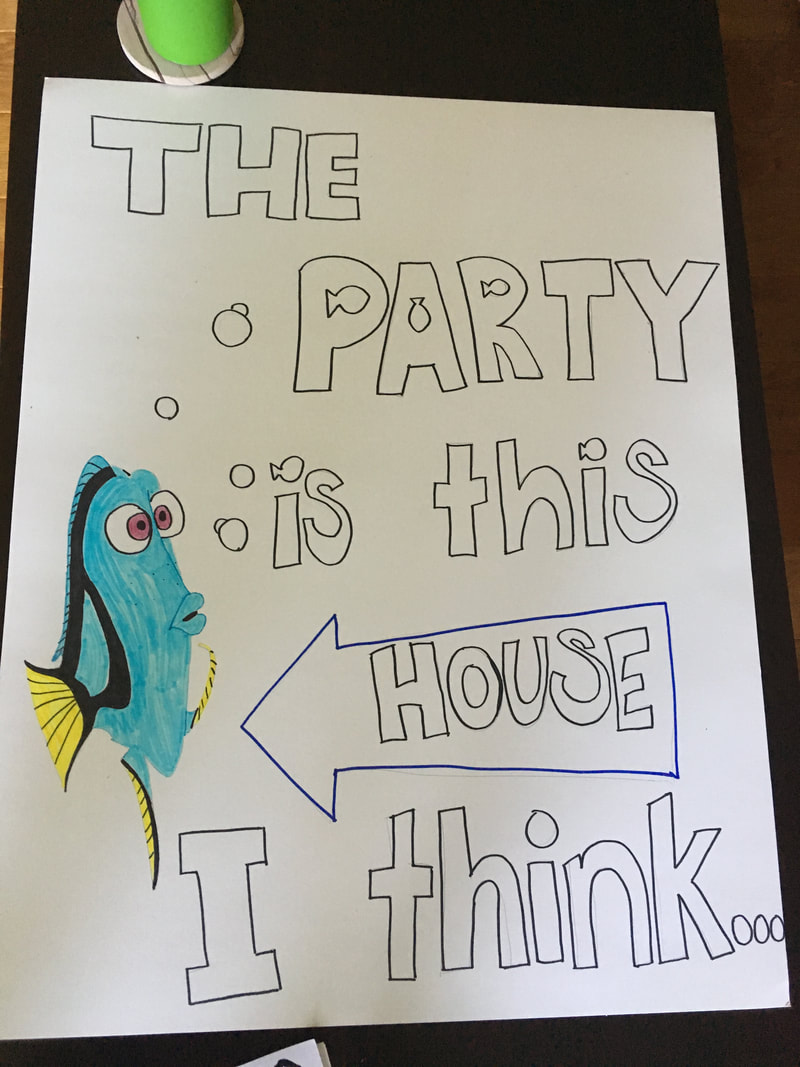
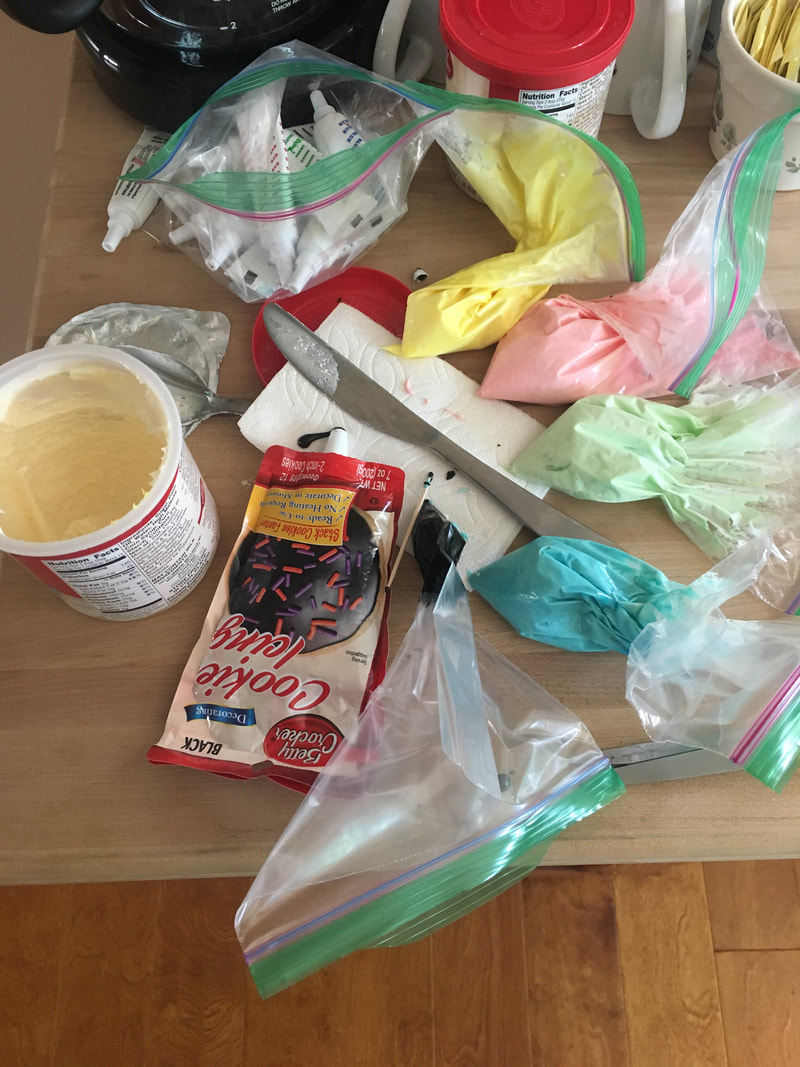
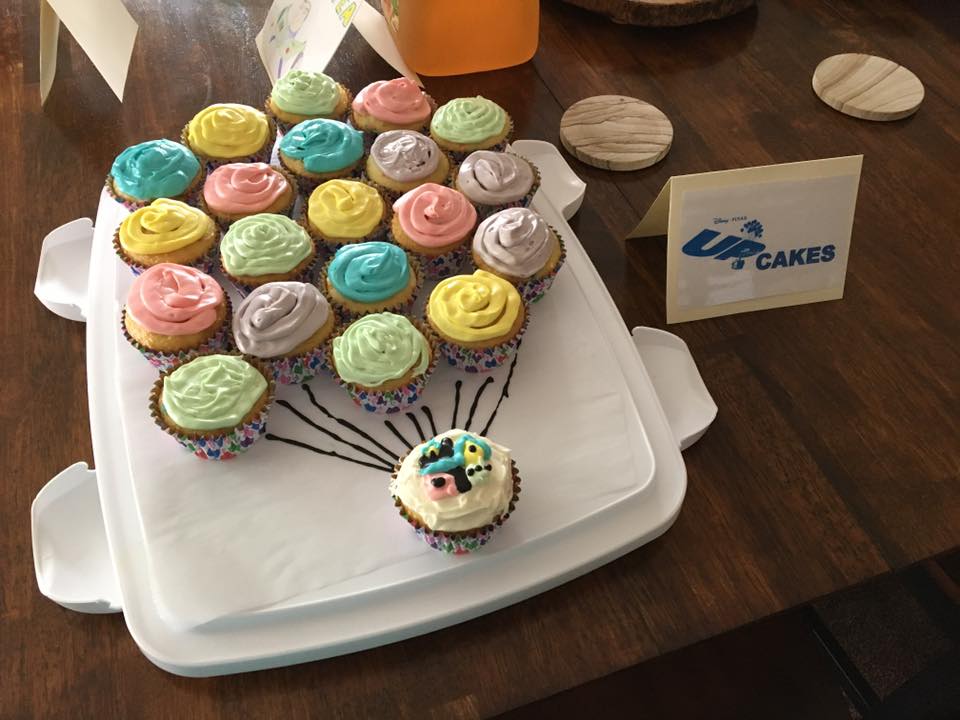 In planning for the Disney shower I came across this idea on Pinterest, but it was just that, an idea. So, rather than paying someone to make it, I found these balloon cupcake holders on sale and bought them instantly. Next, I traveled over to the baking aisle and purchased a box of funfetti cupcakes and vanilla frosting (had to be a frosting you could dye). I used a 2 Tbs scoop for the cupcake badder and have never had more perfect cupcakes! Once the cupcakes were done and cooled, I got to work on the decorating part.
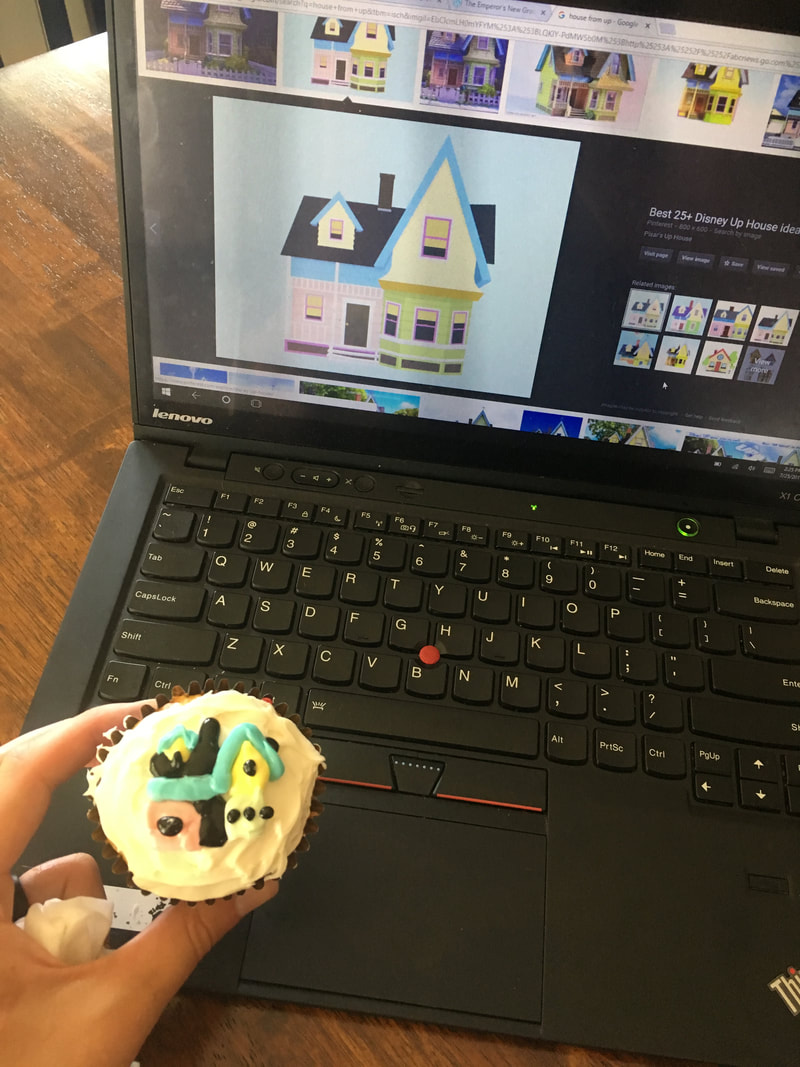
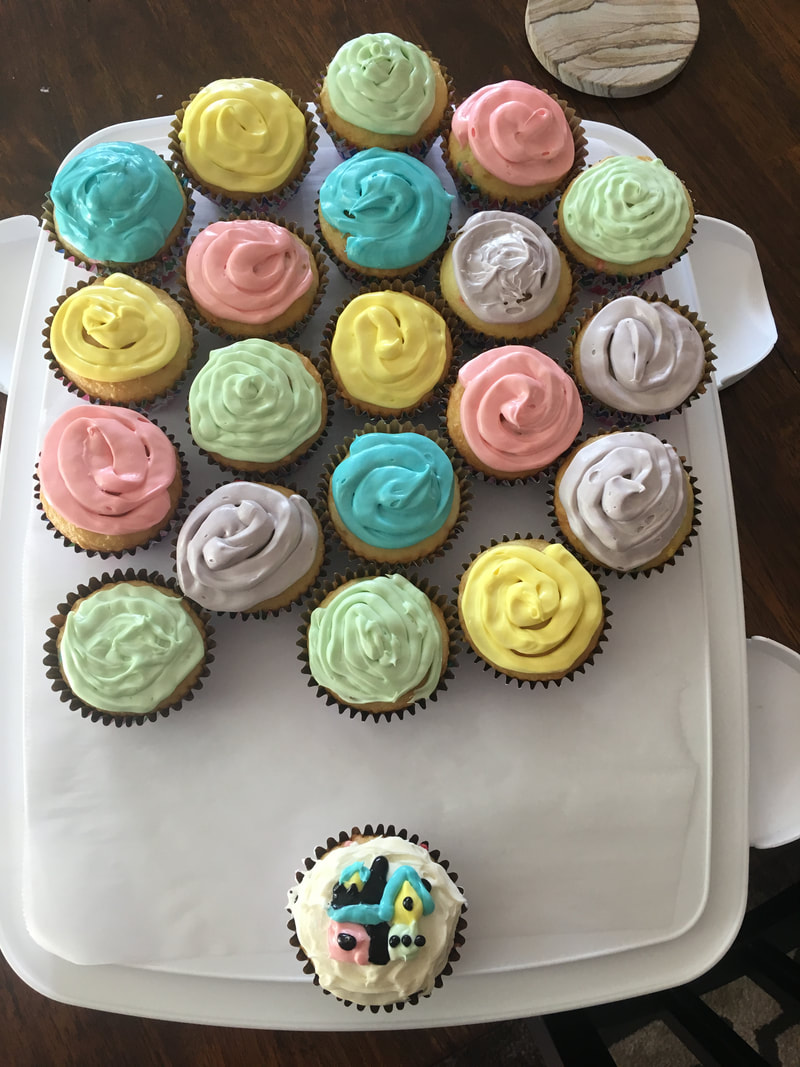
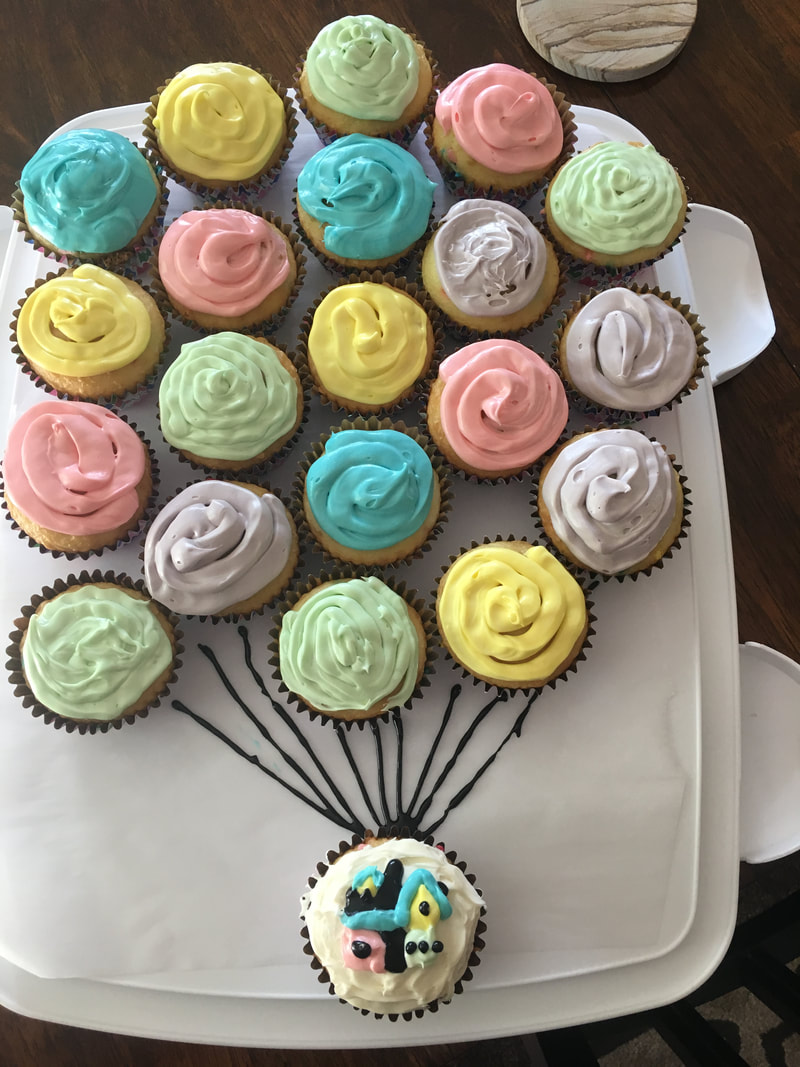
So it's not perfect, but it's recognizable, especially from further away. Once I had finished the house I used the remaining frosting on the other cupcakes. I did cut a larger hole to make the frosting process faster. As they were frosted I arranged them on parchment paper on a cupcake holder in a bunch with the house at the bottom. Like I mentioned before, the extra frosting did about 4 extra cupcakes with the spoonful, so I did mix up another color in the tub of remaining frosting for the remaining 4 cupcakes. I chose purple, but any balloon color would do! The final step after I had them all frosted was to make them balloons. In order to do that I went back to my black frosting and made "strings" to my bottom few balloons and some extra until it looked like I had enough.
I made the UPcake sign in the first picture and done! The mom-to-be LOVED it. A 40 minutes well spent!
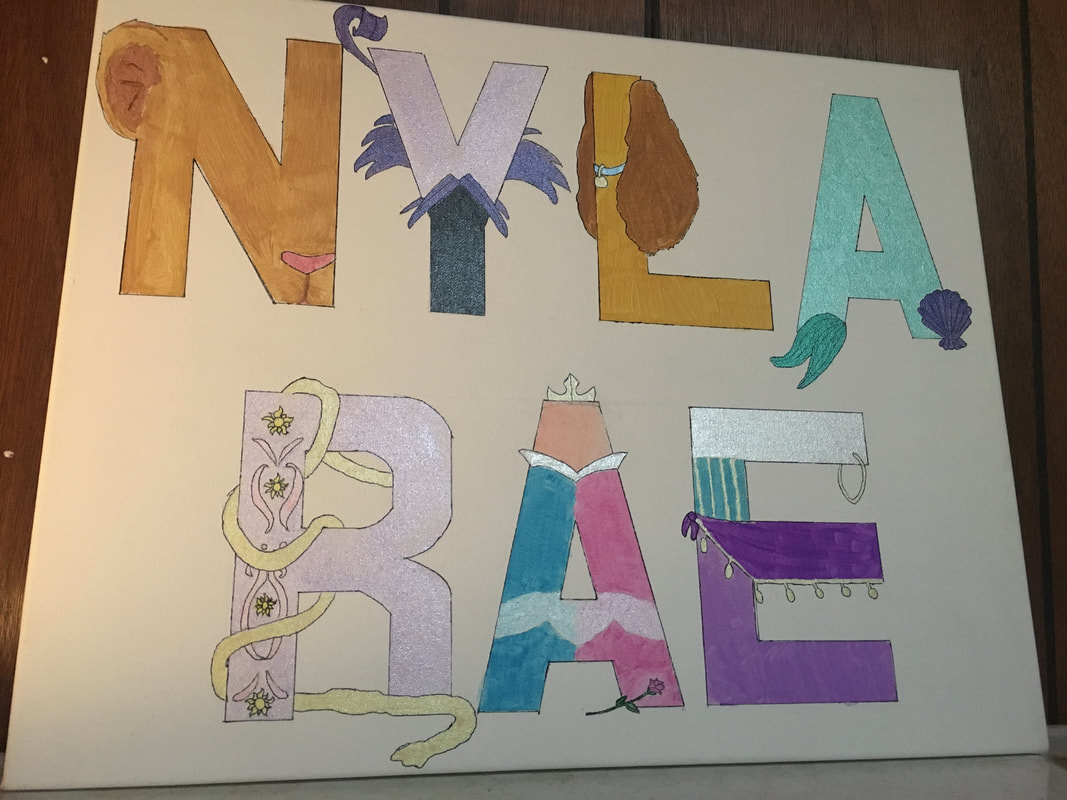
So, tomorrow is finally the Disney Baby Shower I've been posting pieces of forever! Like I have said in my showers past I am a believer that your decorations should also make good gifts because then you are only spending money once. Because of this philosophy, I got to work. Since we know the gender and the mama has already picked out a name, I wanted to incorporate it into the decor/party somehow. I kept seeing links to Kim's Crafts on Etsy. They were adorable! It was my inspiration!
For my canvas I needed some ideas. I like the collection of classic Disney shown above, could've gone all princesses (since I knew it was going to be a girl), or even all villians, however I fell in love with the first letter matching the character of this one below: 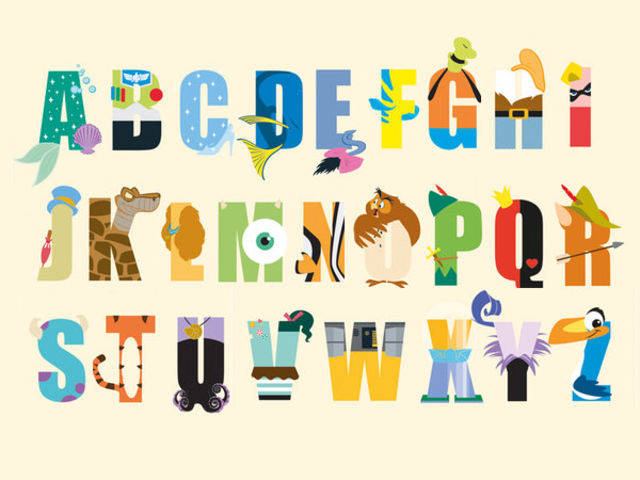 The name I was making (Lydia) was all female characters except the I, so I did some digging to replace it and maintain some consistency. Mouse-Aid was extremely helpful in finding Ivy from the Good Dinosaur for an easy I swap to keep it all female. Otherwise, I knew the rest would work! So I started by measuring a lot! I marked the canvas across and up and down to keep a frame for each letter. I wanted them to take up an equal amount of space and be centered. After that it was time to sketch out the design. Now, I am a lot more confident with my art skills for a piece of paper and pencil, and paint is pushing my limits. So to keep me feeling good and confident about the project I also taped it off after I had successfully sketched out each letter. 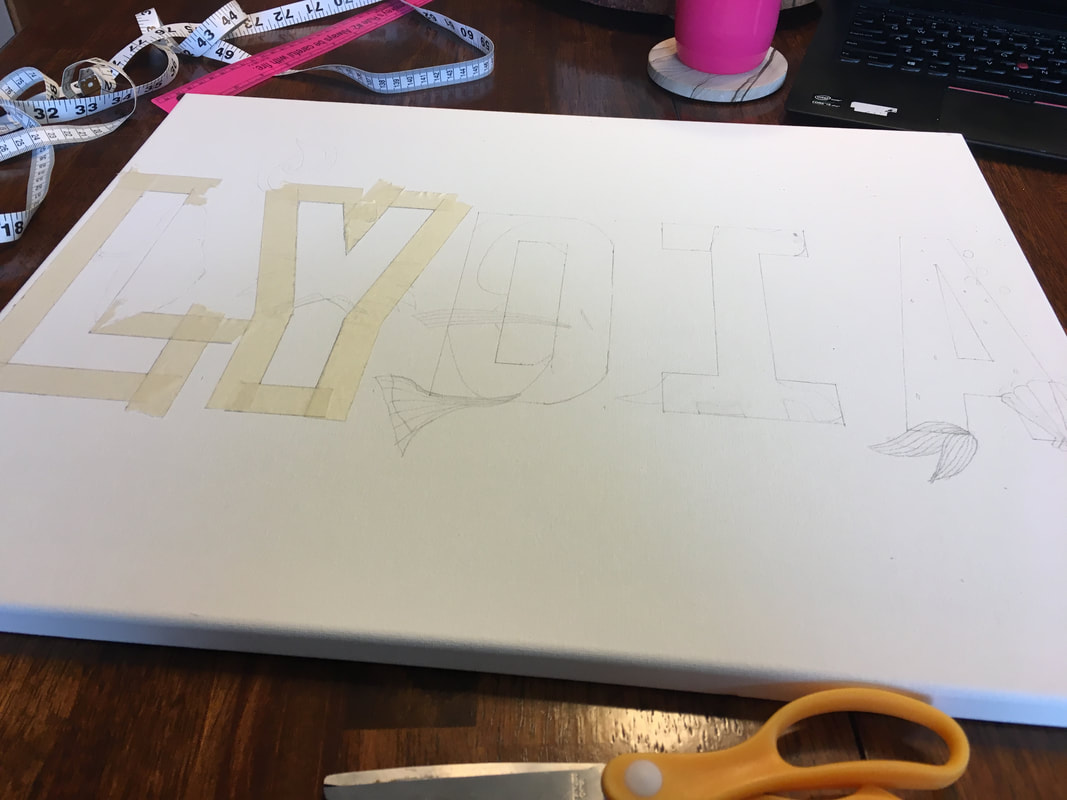  Once I had gotten all the taping done it was time to paint! Again, I will emphasize the beauty of taking what is given to you and keeping what was left over from other projects. I was given a handful of paints from my step mother as junk she didn't want. Little did I know just how useful it would be when doing this project. It was nice to have a wide variety of colors and even though each container was small, it was enough. I started with just painting in the taped lines (the base color for the letter) letting that dry, taking tape off and then painting on the accents. Once that finished, then there were just a few final details with a paint pen (again left overs from a past project). And done! A fun, quick project that will be a nice decoration for the shower and the nursery! 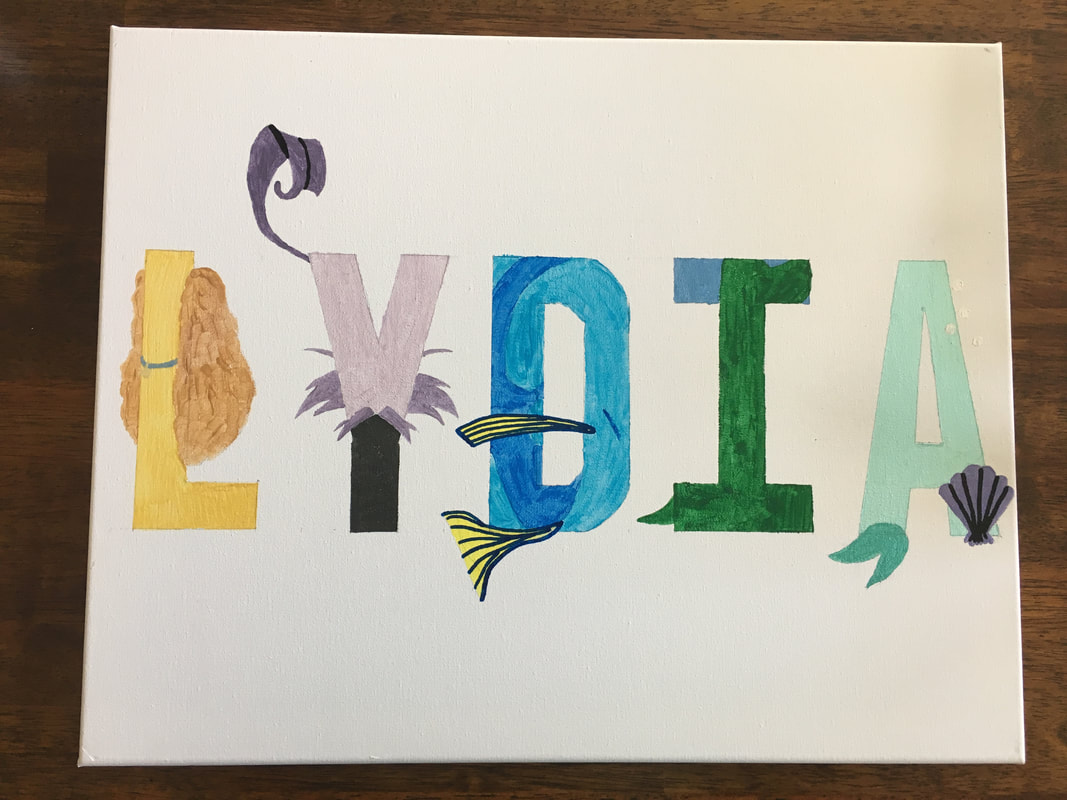 Final project for an artist terrified of using paint. Not too shabby... Another one: Turns out my sister loved this and requested one for my niece. So here is just another example. It's easier than you think to think of Disney Female characters that start with each letter. And sometimes duplicates so that you don't have to repeat letters. Can you name them all?
 It's that time of the year where report cards are already due, the weather is finally nice outside and you still have two weeks left of school. Or maybe your unit finished early and there is no time to squeeze in another and the kids are already going stir crazy ready for summer. I have found the secret to engaging students and teaching/practicing skills those last few days before summer. A large friendly competition. My first full year teaching I held the first Grammar Games. (I hope to be posting a link to that one soon).
This last year we hosted a TriWizard Tournament for our math students. We have a unique situation that made it possible for us to do that in the fact that we have four math teachers (one for each house) and we see the students for an hour and a half. You could modify this for one classroom with just a 50 minute time period also. Here is how our week looked:
I was born into family with two parents that loved me. I had a little sister that came shortly after and they loved her too. The problem was, my parents didn't know how to love one another. When I was in Kindergarten, my parents divorced. They sold our home they had built together and found different places in the area. It's hard to say which parent took the blow harder. My dad was drinking to stop the pain, and I could hear my mom crying at night in her room. Not that they tried to ever let us notice. They did a great job of loving on us, providing for us, and amazingly, always speaking kindly about the other to us. We had the best any two kids from a divorced home could have it, or so I thought. I didn't know what we were missing. One year, over my sister and my spring break, my mom got in a bad car accident with her best friend from high school. We had made a trip to my grandparents for the break with our mom, but got picked up by our dad while mom recovered from her broken back and ankle. There were two people in the car besides my mom and her best friend. A guy and a girl. While the girl was ok because she stayed in the car, the guy had a broken neck, and my mom's best friend died.
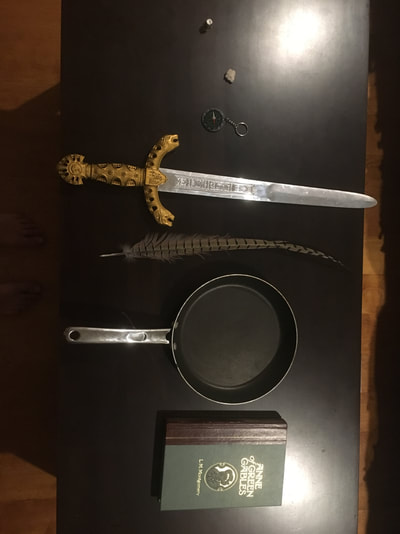
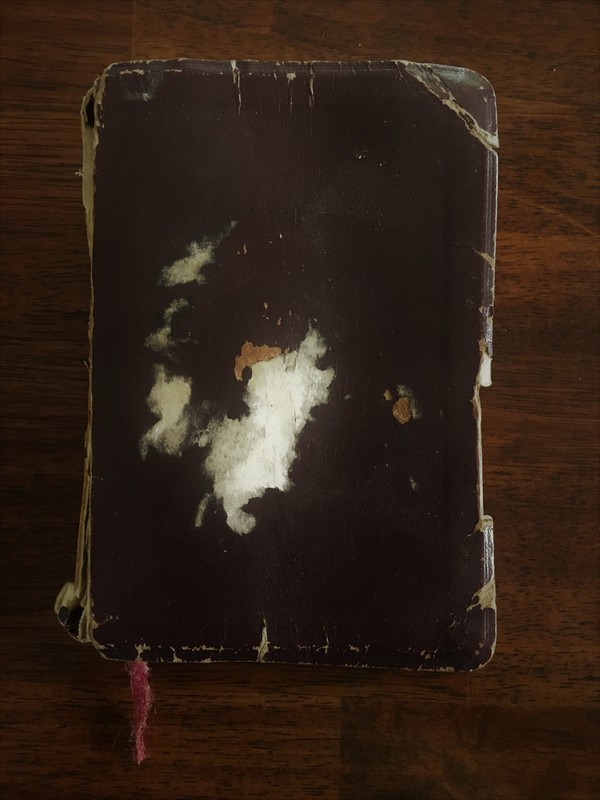
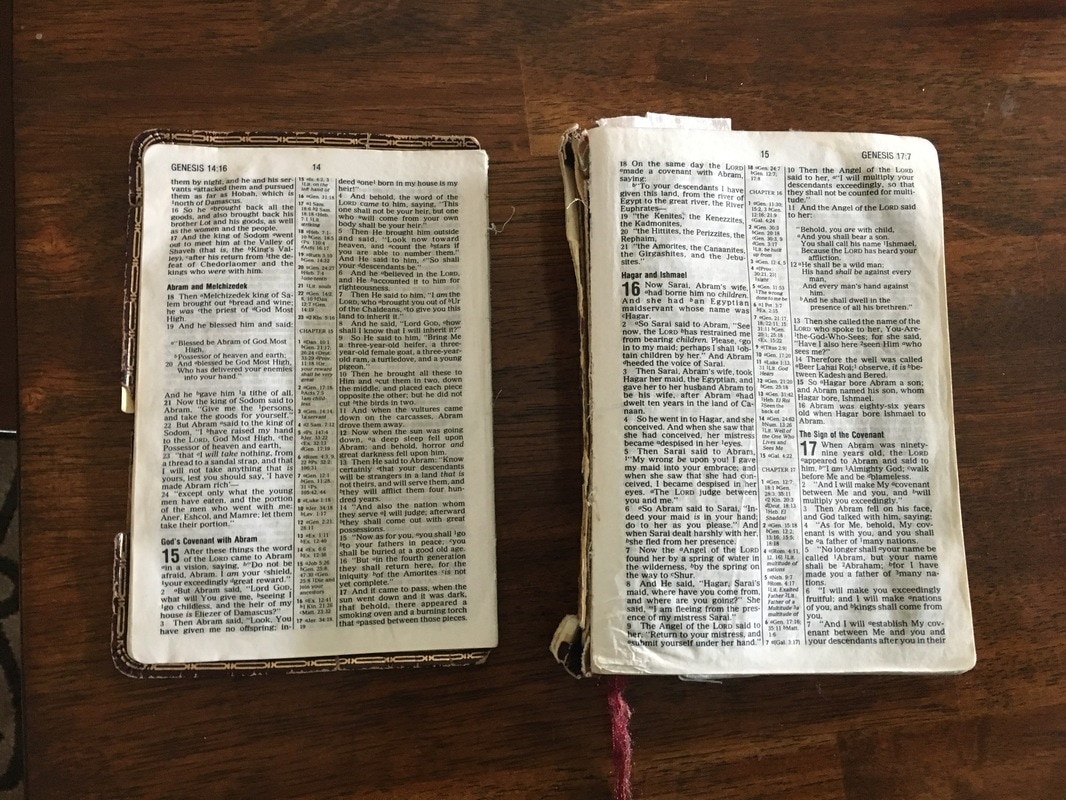
This was hard for my mother and the guy especially. They were both close friends of hers and were also suffering injuries that were going to keep them laid off for weeks. They exchanged phone numbers in case they needed anything. Turns out they did. They started talking, every night, for hours. After exhausting every conversation point and spending some more time together, they got married. On their wedding day, my new step-grandparents were going to attend church before the wedding. They asked to take my sister and me who had never been to church before. My knowledge of God ended with the "Now I lay me down to sleep" prayer. That day at church the focus was on my favorite activity, learning, and couldn't stop talking about it. My new Grandma said, "You keep asking and your parents will take you." It took 4 months before they did. That cold winter morning when we walked into church, the man at pulpit paused mid sentence to welcome us in and my step dad back. They made us feel like we belonged, with no shame for my parents. After that, we started going every week. My parents were baptized that summer and I finally could see what we were missing. At this point, my father, a kind, patient man, had quit drinking and found love again himself. His new wife was sweet and sassy and spoiled my sister and I. She had three kids spaced two years apart evenly above me. It was amazing to have a new family of really good people, but there was still something different. They hadn't invited Jesus into their home and there was an instability that couldn't really be named. I could see it though, even at 8, and I knew which home I wanted mine to be when I grew up. I started studying to be baptized shortly thereafter and was baptized the following summer, 15 July's ago. It was then that I got that Bible at the top of the page and I love it, because it shows my walk with God. It's been there since my walk began and you can see the wear and tear from all the places I've taken God with me. You can see it's damage from when it was forgotten outside in the rain, or left in the care of children with scissors. You can see the struggles I've faced by the promises I've highlighted. It's pages are stuffed with birth announcements, and funeral bulletins. It's seen every season under heaven with me. That's why I love it. But it's only a representation of my God who loves me and has really been there for all of these times. The damage reminds me what can happen when I forget God, and don't take Him with me. And while God and I have already been through a lot together, there are still unread chapters and I have much more growing to do. I'm excited to keep pursuing Him and in the meantime, see what He can make me. My husband often asks "Why do we have this?" whenever something he hasn't seen before surfaces in our home. It may be something that I've held on to, picked up on sale, or an unused gift, but regardless, nothing gets thrown away (including cards we get. I resize a new paper for the inside and reuse them). Many times this has benefited us when quick random projects or events come up. Here is our most recent example:
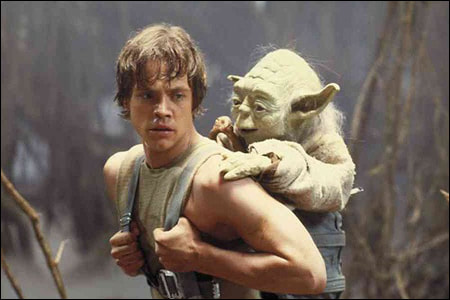
Because of the physical demand, it's important to have the right clothing. Athletic wear is a must, at least for me. This year, my husband and I (shown above) got picked up by a team for a sand tournament who chose the theme Star Wars for our team. I was unaware that theme meant dressing up. We could have paid $50 for the two jerseys the team had left that wouldn't have fit us OR we could have paid $50+ to put in a new order for jerseys that would have fit us. We decided instead to try to make a costume for less. I am happy to announce, I successfully made a costume for both of us for $0. Luke SkywalkerRemembering that the costumes had to be something we could play ultimate in, I was thinking of characters that also had demanding physical tasks. One is Luke Skywalker on the Dagobah System. While there he is getting trained by Yoda and is constantly moving. I decided this would be iconic enough to be recognized. Conveniently, I am enough of a Star Wars fan that I own a plush Yoda that a friend gave me for a gift one year. I had already tested this look for Halloween one year, so with just Yoda, a green camelbak back pack, and a white T-shirt, we get Luke Skywalker. My husband will have to run around with a backpack on, but otherwise mobility shouldn't be limited in his shorts and sleeveless tee.
ReyFor me, I had limited choices if I wanted a female character. The newest female lead, Rey, lived on Jakku, a desert planet. I figured an outfit suited for the desert will work for a beach. Looking at Rey costumes they were all very elaborate and would have been cumbersome to run in so I needed minimize the amount of costume and maximize its ability to be recognized. I knew base layer would be a tank top of a gray-tan color and my ultimate shorts which are gray. Not an exact match, but pretty close. For the iconic criss-cross look from the fabric over those I used cheesecloth that had been used at our wedding as tulle. It is gauze-like so it breathes easily and is light! I did need the two belts to keep it in place and keep the iconic look since I wouldn't be carrying anything else she does. I did decide to make her "sleeves" out of extra cheesecloth, but make no promises that they will stay through the whole day of ultimate. The absolute best part is her hair! Since I cut my hair there are little pieces always falling out. Rey wears her hair in three buns down the back of her head and it will hold in all my little hairs, even while I'm playing. It is the perfect hair style for sports with hair my length (I even wore it like that to other games)! In the end, for piecing it together from things from home, I wouldn't say it's too bad!
Now, I recognize neither of these are perfect costumes. They would be shunned at a Cosplay event. However, when making costumes to fit a specific even it is more important to capture the essence of the character while still maintaining functionality (something I learned from my mom's Halloween costumes that always started with a sweat suit as the base layer to keep us warm). So, how do you think I did?
 For the TARDIS I was winging it. I traded colors each row for awhile as you can see in the picture before I wove the ends in. It was agonizing but easy to visualize the size I wanted. After that (pretty much right where the ends end, I got smart and made strips and squares and pieced them together. This made it much nicer and having smaller goals (like finishing a square) was motivating for me. I just made all of the pieces until they were the right size and crocheted them together. I knew I could embroider the top words but for 'POLICE' and 'BOX' it was too narrow and I had to crochet them but I left space for 'PUBLIC CALL' to be embroidered in between. I couldn't visualize that as I was working like I could the rest of the TARDIS so I needed to make a plan. I opened up an excel sheet to help me with the planning. I had used double stitching (my favorite fast stitch) the whole blanket so I decided if I used the cells like sideways stitches I could make a plan. I counted how many stitches long and wide I wanted and blacked out those cells. Then I zoomed out and with white went through and "wrote" police and box until I had it how I wanted it. I lost the original piece I did this for but have the second pattern I made to help it make more sense. I think it worked out pretty well in the end. Note: The back was not very pretty, So my mom helped me put a back on this one before I gave it to my roommate, but I don't have a finished product picture.  On the next blanket I knew I wanted to put the U.P. on it. For those of you who are wondering what the heck a U.P. is it's the upper peninsula of Michigan. Now, I could not find a pattern for crocheting this iconic logo but I did not get discouraged, Instead I made my own! I picked out two of their wedding colors (charcoal gray and lake blue) and set to work on the U.P. Again, I went into excel and pulled up a spreadsheet. I chained out how long I wanted the blanket so I knew how many cells to use. I stuck with using double crochet so I worked it sideways I outlined the size in blue (down to 154 over to AH), zoomed out and "drew" my pattern in gray. I had excel minimized to a half screen a picture of the UP on the other half of the screen. Make sure you turn it to get it the right way because it's deceiving trying to do it mentally.  It was a pretty long process for something I wasn't even sure if it would work. But it did! I was happy enough to keep going so I put the couples' names at the top and last name and year of the wedding at the bottom (using the same excel sheet pattern making process). If you follow close enough to your pattern and trust it, it should come out pretty good. After I finished piecing together the names to the U.P. I did a border to tie it all together and then did a wave stitch around the outside since the U.P. is touching three Great Lakes. I learned how to do the wave stitch at this site here (Thank you for putting this together so nicely Brittany!). Below is the almost finished product (I don't know what I have against taking a picture of my work when it's done, but you get the idea). This couple did an unexpected public gift opening and this reaction was by far the best! I got requests and questions from many. 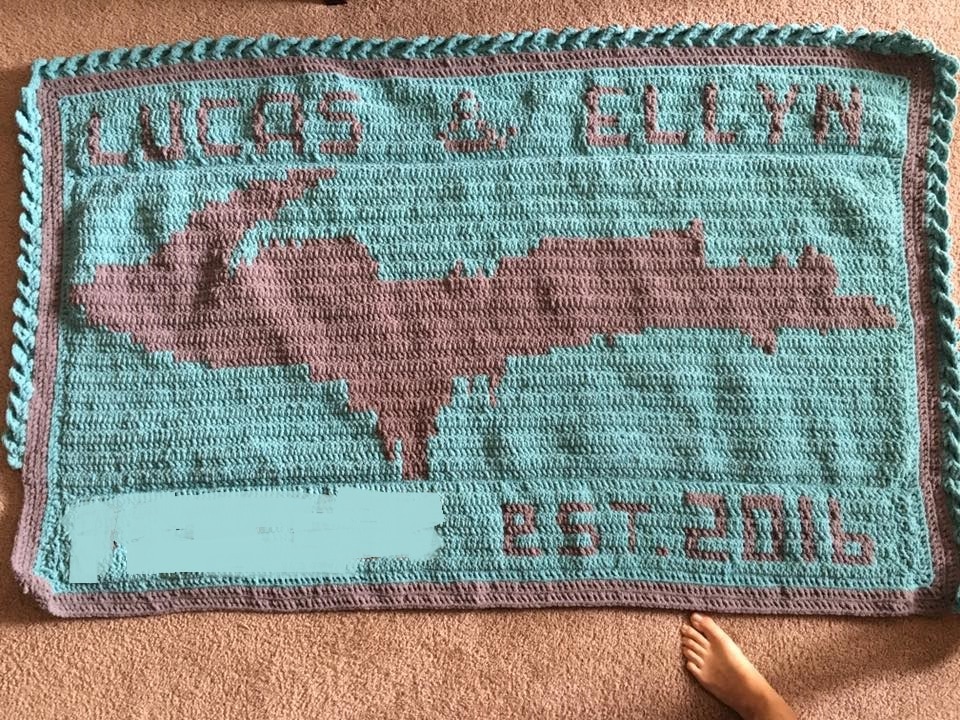 Overall, I hope this gave you some useful information on how to make a pattern for yourself for whatever your next crochet project is! Feel free to share with me what you make!
I'm very into themes. Anything with a theme should stick to the theme. Therefore when throwing a Disney themed baby shower, I wanted games that stuck to the theme like the door prize box and the invitations. I found a few good ideas from A Crafty Spoonful and then ran with my own. With the brainstorming of my mom, sister, and husband, we invented a game I'm really excited to play. Who Brought What? The premise is this: a bunch of Disney characters that wanted to come to the party but couldn't dropped off gifts for the mom-to-be and baby but they all forgot to put their name on the present. So it's up to the guests to match the Disney character with their gifts. Here were some of our ideas:
 It's that time of the year again! We all gather together and celebrate our country. And, just like every gathering we need some food! I usually tend to gravitate towards dessert because,
|
AuthorI am someone who loves to write. I like to think and be creative. I was encouraged by my husband to write more and so this is me writing. Hope you find something of value in these words. Archives
December 2019
|


 RSS Feed
