 For the TARDIS I was winging it. I traded colors each row for awhile as you can see in the picture before I wove the ends in. It was agonizing but easy to visualize the size I wanted. After that (pretty much right where the ends end, I got smart and made strips and squares and pieced them together. This made it much nicer and having smaller goals (like finishing a square) was motivating for me. I just made all of the pieces until they were the right size and crocheted them together. I knew I could embroider the top words but for 'POLICE' and 'BOX' it was too narrow and I had to crochet them but I left space for 'PUBLIC CALL' to be embroidered in between. I couldn't visualize that as I was working like I could the rest of the TARDIS so I needed to make a plan. I opened up an excel sheet to help me with the planning. I had used double stitching (my favorite fast stitch) the whole blanket so I decided if I used the cells like sideways stitches I could make a plan. I counted how many stitches long and wide I wanted and blacked out those cells. Then I zoomed out and with white went through and "wrote" police and box until I had it how I wanted it. I lost the original piece I did this for but have the second pattern I made to help it make more sense. I think it worked out pretty well in the end. Note: The back was not very pretty, So my mom helped me put a back on this one before I gave it to my roommate, but I don't have a finished product picture.  On the next blanket I knew I wanted to put the U.P. on it. For those of you who are wondering what the heck a U.P. is it's the upper peninsula of Michigan. Now, I could not find a pattern for crocheting this iconic logo but I did not get discouraged, Instead I made my own! I picked out two of their wedding colors (charcoal gray and lake blue) and set to work on the U.P. Again, I went into excel and pulled up a spreadsheet. I chained out how long I wanted the blanket so I knew how many cells to use. I stuck with using double crochet so I worked it sideways I outlined the size in blue (down to 154 over to AH), zoomed out and "drew" my pattern in gray. I had excel minimized to a half screen a picture of the UP on the other half of the screen. Make sure you turn it to get it the right way because it's deceiving trying to do it mentally.  It was a pretty long process for something I wasn't even sure if it would work. But it did! I was happy enough to keep going so I put the couples' names at the top and last name and year of the wedding at the bottom (using the same excel sheet pattern making process). If you follow close enough to your pattern and trust it, it should come out pretty good. After I finished piecing together the names to the U.P. I did a border to tie it all together and then did a wave stitch around the outside since the U.P. is touching three Great Lakes. I learned how to do the wave stitch at this site here (Thank you for putting this together so nicely Brittany!). Below is the almost finished product (I don't know what I have against taking a picture of my work when it's done, but you get the idea). This couple did an unexpected public gift opening and this reaction was by far the best! I got requests and questions from many. 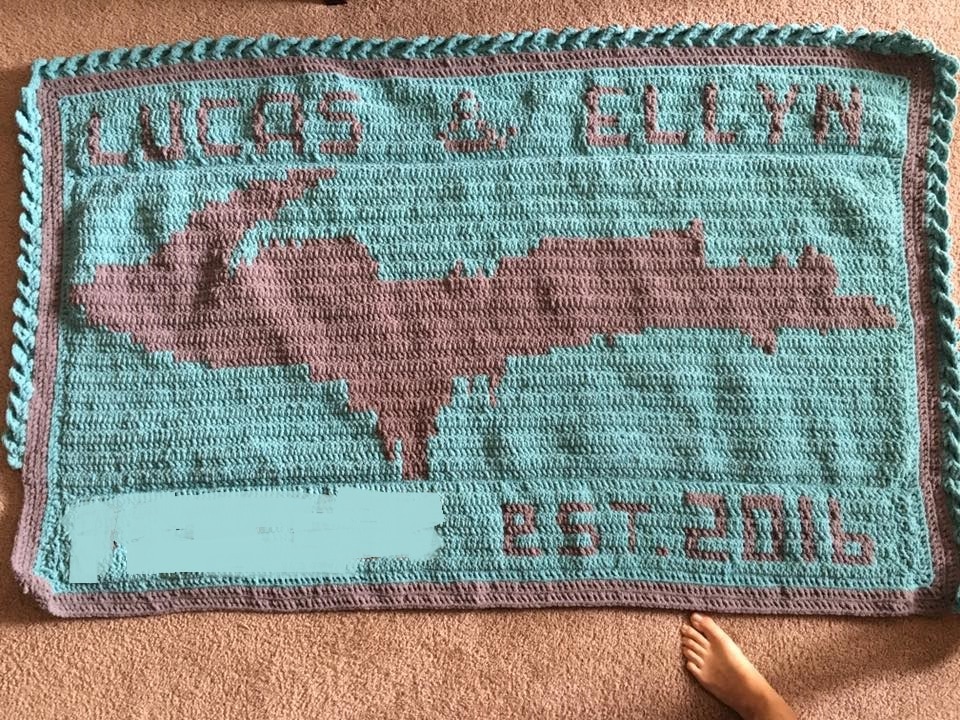 Overall, I hope this gave you some useful information on how to make a pattern for yourself for whatever your next crochet project is! Feel free to share with me what you make!
0 Comments
Leave a Reply. |
AuthorI am someone who loves to write. I like to think and be creative. I was encouraged by my husband to write more and so this is me writing. Hope you find something of value in these words. Archives
December 2019
|

 RSS Feed
